If you know your way around a car and know the difference between a screwdriver and a set of pliers, you may find some of our recent topics to be a bit basic. This is intentional.
GearSlap is a website for motorsports enthusiasts and people who like to work on and build cars. But everyone has to start somewhere. Sure, we’re all about racecars, Baja trucks and offroading, but we try and meet people where they are.
And sometimes that’s at the very beginning.
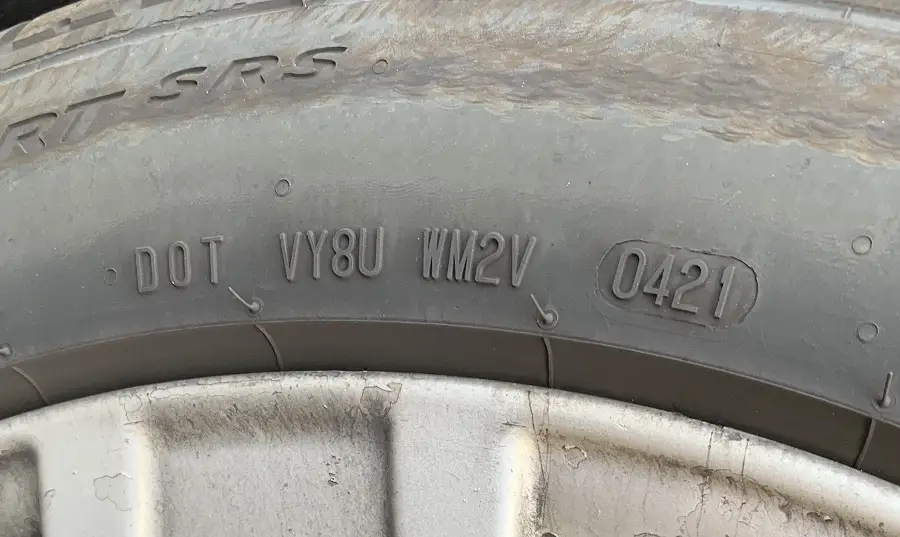
I was reminded of this recently as we were working on my son’s project truck. We had to put smaller tires on it so we could pull it into the garage so we can start on the bodywork. I bought some cheap “scabs” off of Craigslist (scabs is a term I grew up with – that’s what my dad would call the worn-out, mismatched, cheap takeoffs we’d buy to put on our “driveway car”.)
My son’s friend came over “to help” and I told him to check the pressure in the new tires to make sure they were holding air. He didn’t know what I was talking about.
GearSlap is also about teaching beginners. It’s my way of sharing my knowledge with my son – and his friends – if they happen to come across it. At the same time, it’s for someone like you – you found this article after all!
So, here’s what I taught my son’s friend after he told me that he didn’t know how to check tire pressure:
How to Check Tire Pressure
When checking your tire pressure, follow these steps:
- Prepare your car. Park it on a flat surface with the wheels as straight as possible. Let your car sit until the tires are cool to the touch. (Try to check your tires when the temperature is mild as this will give you the most accurate and proper tire pressure reading.)
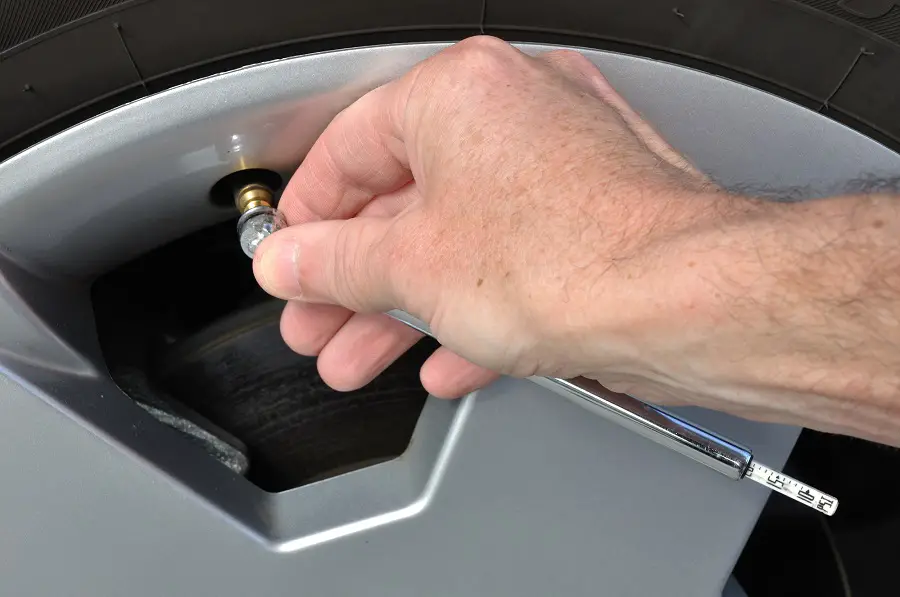
Tire pressures usually rise as the tire heats up. - Remove the end caps. Be careful – they’re easy to lose. A Ziploc bag works well as a storage pouch. If you do lose a valve stem cover, it’s not the end of the world. You can get another one or you can just leave it off. It only helps prevent minimal leakage from the valve core.
- Place the gauge onto the valve stem. You’ll hear a brief hissing noise (if it continues to hiss then you don’t have a good seal or your gauge is bad). There is usually a round end of the gauge that you put over the valve stem. On the back of some gauges there’s a little nipple – this is used for deflating the tire if it’s too full.
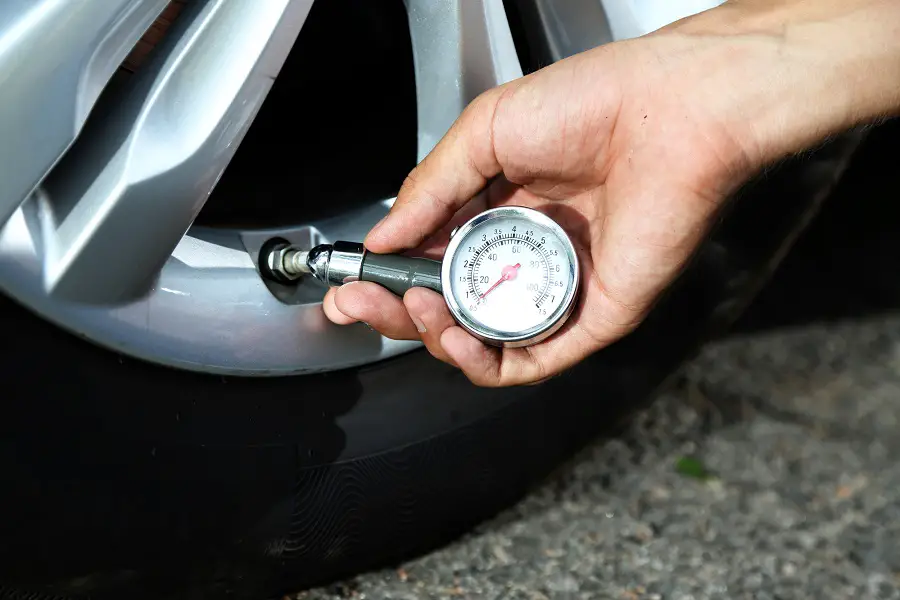
- Read the gauge. With a stick gauge, the reading might have a bit of wiggle room. Make sure you’re reading the correct measurement (PSI, Bar or kPa) and keep that consistent for all tires – you don’t want to read one in kPa (which measures pressure in Pascals) and one in PSI (which measures pounds of pressure per square inch).
- Take appropriate action. It isn’t just enough to get a pressure reading. You need to do something with the data. If you have an air compressor you will fill any tires that are low until they are at the correct reading. If they are too full, you’ll want to release some air until you reach the desired pressure.
If the reading on the gauge is higher than the recommended pressure, let some air out of the tires. You can use the gauge itself to do this. The sound of pressurized air hissing indicates the PSI in the tire is decreasing. If the reading is lower than what’s recommended, you’ll need to use a tire pump to inflate the tire. - Repeat the process. Getting the gauge on the value is sometimes tricky, so it’s better to read each tire at least twice, just to correct for any off readings. Once you’re satisfied, move on to the next tire(s).
The correct tire pressure for your vehicle is found on a sticker inside the driver’s door and in the owner’s manual. It lists the PSI for each tire (or kPa/Bar depending on where you live). Follow the guidelines exactly, as they’re determined by your vehicle’s specific weight, towing capacity, tire size, and other factors.
If you have aftermarket wheels & tires that aren’t the factory size, you’ll have a different target pressure than from the factory. Sometimes this will be significant if your tires are really different than stock.
If you have different sized tires on your car (smaller tires in the front and bigger tires in the back for example), then the target tire pressure will most likely not be the same for all tires either.
How Often Should You Check Your Tire Pressure?
How often should you check your tire pressure? I recommend checking it at the following times:
- At least once a month
- Whenever the tire pressure warning light appears on the dash
- If you notice that it feels sluggish when turning or you feel “drag” when driving. Sometimes, a low/flat tire will feel like you’ve hit a patch of ice or gravel (it will feel “loose”).
Tires will normally lose about one PSI (pounds per square inch) of inflation every month. Checking your tires and filling them as necessary is a part of routine monthly vehicle maintenance.
While once a month is the minimum, you’ll likely want to check them more frequently when the weather is warm. For every 10 degrees the temperature rises, the pressure inside a vehicle’s tire can increase by one PSI. Overinflated tires can wear unevenly and even burst, so staying on top of pressure increases is important.
Don’t forget to use your tire gauge and check the pressure on your spare tire frequently as well. Even if it’s a “donut” you want to check it occasionally so that when you need it, it’s full. Obviously, if your spare is a run-flat tire or airless spare then you won’t need to check it.
Best Way to Check Your Tire Pressure (Type of Gauge)
Checking your tire pressure is quick, easy, and requires no extensive mechanical know-how.
First, you’ll need a tire pressure gauge. There are three options:
- Stick Gauge The classic type is available at practically any gas station. It’s affordable, portable and will give you an accurate reading almost every time. The gauge in the photo above is a stick gauge.
- Dial Gauge This type of gauge will give you a very accurate reading in most cases. It functions like the other gauges but the pressure is indicated by a needle going around a dial. The photo below is a dial gauge.
- Digital Gauge For around $15 or so, you can find a battery-operated gauge that delivers a precise reading. (This is my recommendation because it’s the most accurate.)
- TPMS (Tire Pressure Monitoring System) Let’s be honest, most cars today have onboard pressure monitors and will display your tire pressure right on the dash. It takes away a lot of the work to check your tires. But these electronic systems aren’t without error or failure. You should check the pressure in your tires manually at least every two months – even if you have TPMS on your car.
- It’s also a good time to remind you that some TPM Systems need to be reset or recalibrated occasionally – especially if you rotate your tires or get a repair. Otherwise, the monitor may be tied to the wrong wheel on the display or have an incorrect pressure tolerance set in the computer.
- You can add TPMS to most cars as sold by some aftermarket manufacturers.
Should All Car Tires Have the Same Pressure?
If the tire pressure requirements for your tires vary, the difference will be between the front and rear tires. Tires on the same axle will always have the same PSI requirements.
The pressure requirements for each tire, and the overall balance between all four, are determined by the vehicle’s size, type, and carrying capacity.
For example, most smaller sedans and hatchbacks use the same pressure in both the front and rear tires. Vehicles of this size have a specific load capacity. Even if the car is at full capacity, the total weight is evenly spread out across the entire car.
However, SUVs and pickups work in a different way. The front tires mainly bear the weight of the engine, which stays consistent. But the weight in the rear of the vehicle can change substantially based on the type of cargo or number of passengers. The heavier the load, the higher the PSI required to handle the additional weight.
This applies equally if you’re towing a trailer.
Why Does Tire Pressure Fluctuate?
You may have noticed that your tire pressure seemingly changes by itself. One day it’s reading higher than normal and then a few days later all four tires may show that they’re a bit low.
If you notice a change in your car’s tire pressure, it is important to understand why it occurred because the cause can help you determine if the tire is seriously damaged.
As described above, temperature is the most significant factor. Typically starting in the Fall and continuing throughout Winter, you can expect your tires’ pressure to drop. In the warmer months, you’ll need to watch for overinflation.
Aside from seasonal changes, even temperature fluctuations between the day and night will affect your tires. For example, in the winter, you’ll probably want to check your tires before driving in the morning, as the temperature drop during the night can result in lost pressure.
Cold weather influences tire pressure. For every 10 degrees the temperature drops, tires can lose one PSI. Driving on underinflated tires decreases gas mileage, impacts fuel economy, increases wear and results in a greater chance of total tire failure.
Finally, pressure fluctuation could be unrelated to the temperature. It might occur due to a leak or other type of damage. That’s why determining the reason for the pressure change is so important, so you can identify any potential hazards.
How to Tell if You Have a Leak or Just Barometric Air Pressure Changes
Does the tire pressure in one or more of your tires drop consistently? The cause might be the weather, but it could also be a leak. Fortunately, spotting a leak is fairly straightforward.
- First, inflate the tire to the recommended level. It gives you a baseline so you can measure the rate of pressure loss over time.
- Next, take a close look at the tire. You’re searching for holes, cuts, foreign objects, or other signs of damage.
- If you can’t spot anything with your eyes, try using your ears. Listen for any hissing sound.
- Finally, use your sense of touch. Lightly run your hand around the surface of the tire to see if you can feel any moving air. Use caution and don’t run your hand across the surface of the tire as you can cut yourself on anything that may be lodged in the tire – like glass, pieces of metal, sharp rocks, nails and/or screws. I learned this the hard way.
You can also use the soap and water method. Mix dish soap and water in a household spray bottle. Then spray the mixture liberally on each tire. You’re looking for soap bubbles, which will appear at any leak. (I’ve found this method detects the majority of leaks.)
If you’re confident the tire has a leak but you can’t find it, you can submerge the tire in water. You’ll need to take the tire off the car. Then, place it in a container filled with water, such as a kiddie pool or a bathtub.
How often should you check your tire pressure if you think there’s a slow leak? At least once a day, as leaks are unpredictable, and your tire could suddenly become unsafe to drive on.
You now know more about tire pressure, how (and why) it changes and how to use a gauge to check it than 90% of the general population. You also learned that proper tire inflation (not underinflated or overinflated) will help with fuel efficiency.
I hope it comes in handy someday – even if it’s just to save you from looking dumb when your friend’s dad asks you to check the pressure on some tires!